Tuesday, July 25, 2017

Craftsy Class Review - Startup Library: Quilting with Christa Watson plus 50% Discount Code

Oh boy, do I have something exciting to share with you today!
 
Photo courtesy of Christa Quilts
I got to take Christa Watson's new class on Craftsy called Startup Library: Quilting and it was so much fun.  Craftsy classes are neat because once you have them in your class library, you can watch them as many times as you want and they are available forever!  This is definitely a good thing with this class as there is a lot of information given in the first couple lessons, and it is worth watching a couple times to pick up on things you may have missed.  Another nice feature with the classes that you purchase is that you can ask questions and the teacher will actually answer them, so you know you are getting expert advise.
 
Photo courtesy of Christa Quilts
This class is fantastic for beginning quilters who are looking for clear step-by-step instruction and knowledge.  The class consists of 14 lessons with nearly 6 hours of instruction.  There is a printout that breaks down the lessons into all the steps Christa talks about and demonstrates, with the times during that lesson so you can quickly re-watch a step when needed.  The printout also defines many of the processes and lingo used in quilting and has the pattern for the quilt made in the class which is called Friendship Stars (shown above). 

Photo courtesy of Christa Quilts
I enjoyed a lot of things about this class.  The camera angles used, the close-up view during processes, the simplicity of the pattern, and the fact that as an experienced quilter I actually learned some new tricks!  That makes this class a worthwhile investment to me. 
 
Photo courtesy of Christa Quilts
 My favorite trick that I am excited to use is her basting technique.  You just need one table, a can of basting spray, a large ruler (such as a 6 inch by 24 inch), and a well ventilated area.  And depending on the size of the quilt, a helper.  :)
 
Photo courtesy of Christa Quilts

Christa is well-known for quilting on her home sewing machine.  She walks you through using both your walking foot and free-motion quilting as options for quilting your quilt. 
This class literally takes you from barely knowing what quilting is to fully creating a quilt!  And as I mentioned before, this class is certainly useful for an experienced quilter as well, there are always new techniques to try out.  I hope you will also hop over to Christa's page and read some of the behind-the-scenes that she has on her post.
 
Now, one of the things Christa says early in the video is to "take what you learn and make it your own".  I have mentioned before that I have a tendency to switch things up in a pattern, I'm not sure that I've made a pattern completely to the letter of the instructions since I began quilting.  I even changed up a block in the very first quilt I ever made!
 
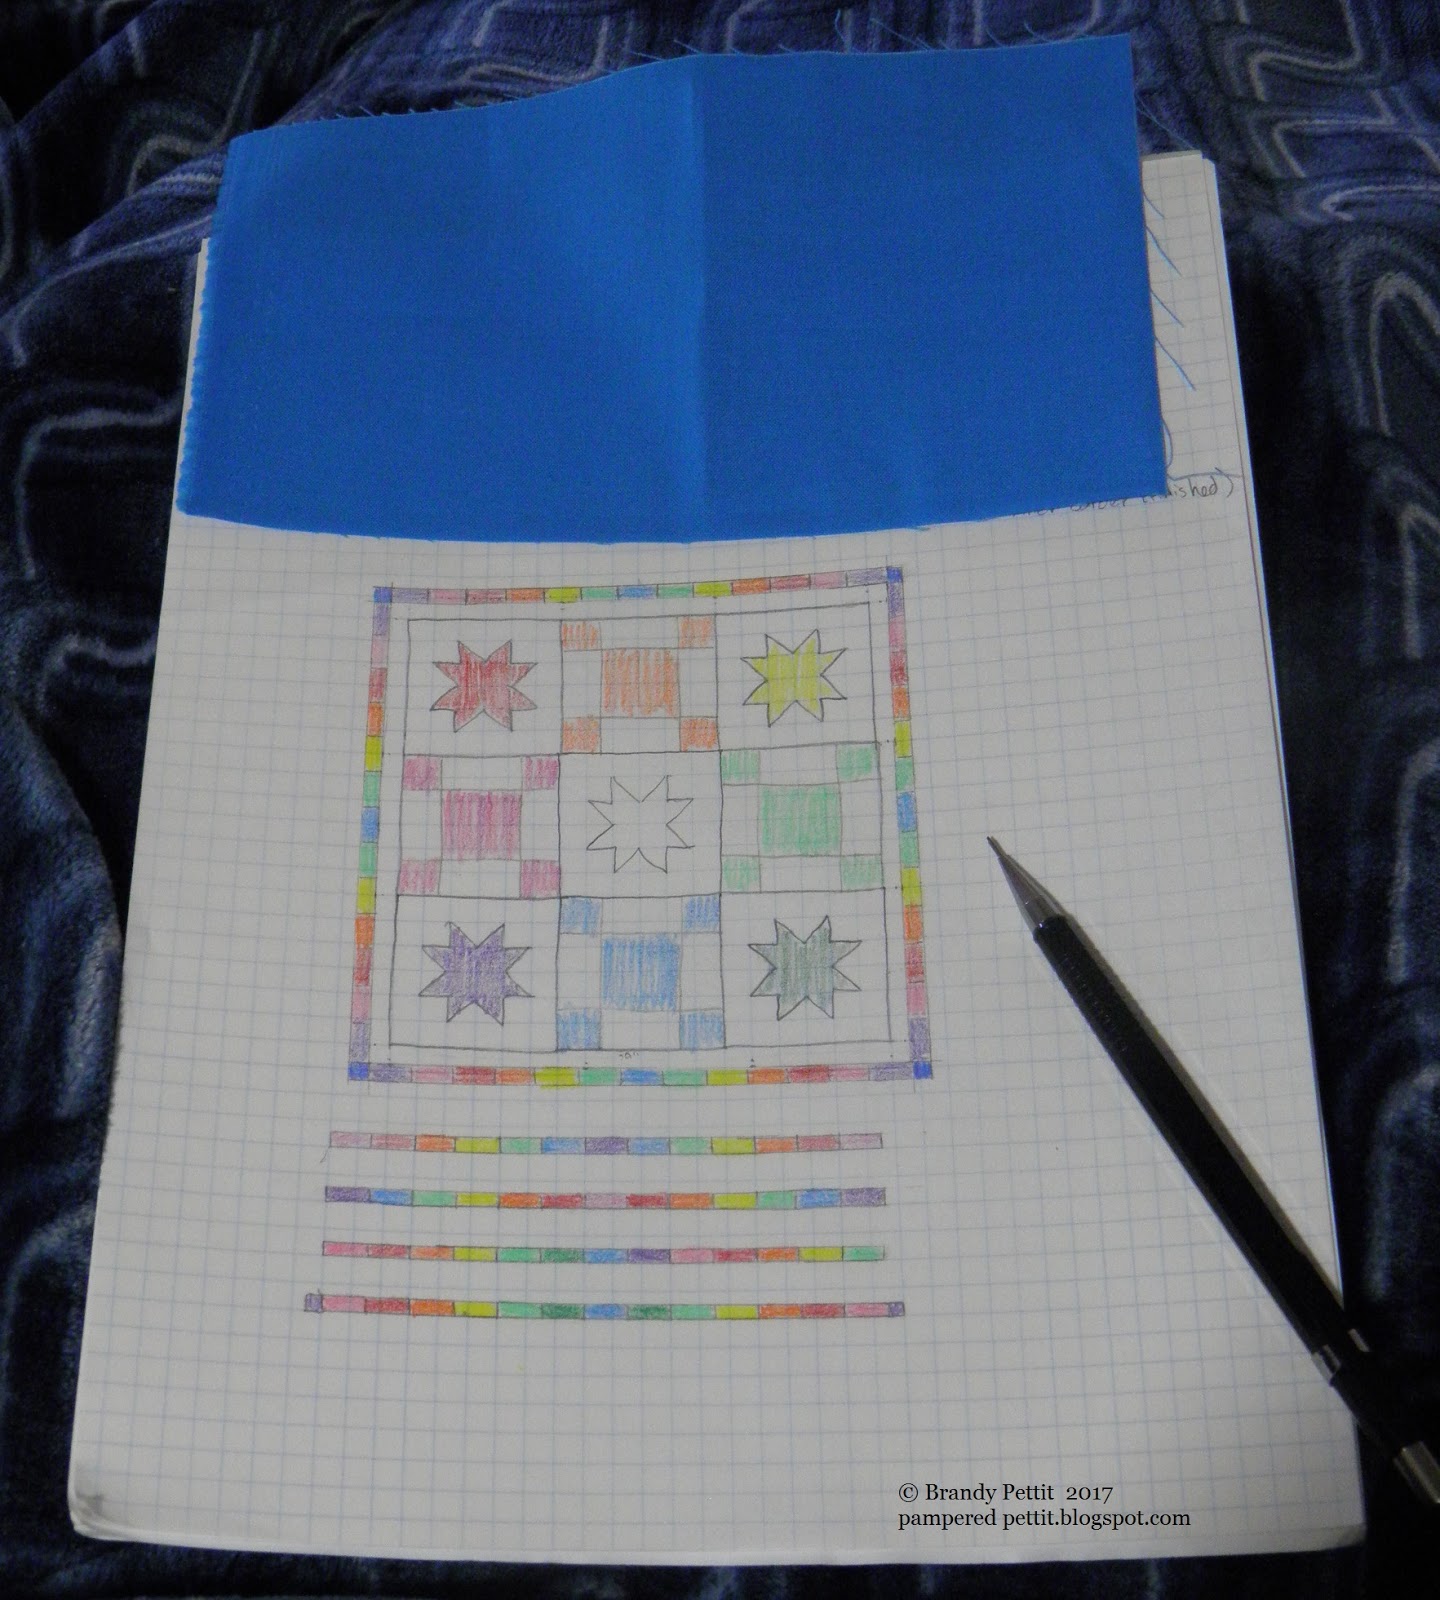
That being said, here is the top I made this weekend:
 
I went with a Sawtooth Star in place of the Friendship Star and decided to make 9 blocks instead of 25.  I love how quickly it came together, simple 12 inch blocks are the best.
At first I thought I would be donating this but it's not going to happen, LOL, this is definitely staying with me!  Every time I see it I do a happy dance.
 
 
I am still figuring out the border, I only have that little scrap of blue left so I wanted to plan the border around it.  I may add another cream border after the pieced border also, then use the center star's fabric as the binding.  And depending on how much jean material I have left after finishing my sister's quilt, I am thinking a jean backing for this one as well.
 
Now, I have a special code for you to be able to take this class at 50% off the regular price, how great is that!  Follow this link http://craftsy.me/2v4ZQeF and it will add the discount to your cart.  The discount will be reflected once you click "Buy Now".  The discount is good through October 8th, 2017.
 
Thank you for visiting, have a wonderful day!
~Brandy

Thursday, July 13, 2017

12 Days of Christmas in July - Tutorial and Giveaway

 
Welcome to the first day of the 12 Days of Christmas in July blog hop!  I am excited to share my pillow sham tutorial with you and hope you will also visit Carole at From My Carolina Home and Sharon at Vroomans Quilts to see what they have made.  You can see the full line up of blogs here.  If you leave us all comments on our featured days you will be entered to win a prize and there will be prizes for each day of the hop!  Be sure to also swing by and thank Sarah at Confessions of a Fabric Addict for putting all this together.
 
Pillow shams are a great way to use up scraps and practice free-motion quilting (FMQ). I made my pillow sham to fit a 16 inch pillow form, wanting something larger to cuddle with during the winter. Winter seems very far away at the moment with this 100° weather!
I used 1.5-inch strips of Christmas fabric to create strippy half-square triangle blocks that finished at 4 inches, then arranged them in a pinwheel pattern according to my husband's input (he said it made him happy, which is important of course).
 
I then basically made a table runner that measured 16.5 inches by 35.5 inches unfinished.  You can see I added a 3.5 inch strip to one end of my top, this was to make it long enough to overlap in the back.
 
 Here is a good shot of my FMQ.  I was able to do a continuous line pattern so I only had to bury a couple threads, a very nice time saver!
After your top is quilted, trim the batting leaving a quarter inch of batting around the edges.  Then bind the short ends.
 
Place the quilted piece right side up on the table. Fold the end that you want to see when the sham is turned right side out approximately 8 inches towards the center.  With the pattern I used I folded it two blocks width.
 
Then fold the other side in so that there is about a 3-inch overlap.  Again, with the pattern I used I folded two blocks width plus the strip.
 
 Here is a close-up of the overlap.
 
I have found I like to clip my edges together using Wonder Clips for the next sewing step because it's pretty thick with four layers of fabric and two layers of batting, and even more so where the flaps overlap.  Using a walking foot, sew a straight seam about half an inch from the edge (I used the edge of my walking foot as measurement).  Take your time as you go over the bound ends so you don't break a needle.  I also suggest backstitching a couple times where the bound ends are to strengthen where the sham will experience the most stress when putting the pillow form in.
 
Next, trim the corners down so that they will be less bulky when turned inside out.  Then sew a wide zigzag along the edge to clean it up and keep the fabric from fraying.
 
 Here is a close-up of my stitching.  The long straight stitch right next to the zigzag is my basting stitch, not the stitch to enclose the pillow sham.
 
 All that is left is to turn the pillow sham inside out!
 
 View from the back.
 
View from the front.
 
I hope you will try making a pillow sham using this method.  Send me a photo if you do!  My email is brandizzle7133 at gmail dot com.
 
Remember to leave a comment on our blogs as you visit to be entered in the giveaways.  There are twelve(!) prizes to be won!
If you need comment inspiration, how about telling me your favorite small, homemade Christmas gift to give or receive, I'm always looking for more ideas!
 
Merry Christmas in July!
~Brandy
 
 
And in case anyone was wondering where the quilt inspectors were during this process, well you can find them near a window, soaking up as much sunshine as possible!
 
 
Linking up to Let's Bee Social at Sew Fresh Quilts
https://sewfreshquilts.blogspot.com/2017/07/lets-bee-social-186.html


Sunday, July 9, 2017

Pattern Testing Reveal - Gradient Stars from Patterns by Jen

I am so happy to share a pattern I tested for Jen at Patterns by Jen.  She released her Gradient Stars pattern on Friday and I hope you will visit her site to see the other testers quilts and check out her other patterns.
 
Here is my completed quilt top, I am still contemplating how I want to quilt it.  John was kind enough to step outside into 100° weather and hold the quilt up for me.
 
One thing I did a little different from the original instructions was to cut my pieces from a strip as shown above.  I was working from my stash so needed to make the best use of my fabrics since I didn't have much extra.
 
Pinning was important for this one, and I had to rework some of my seams to nest better but it was worth it.
 
My stacks ready to be sewn together.
 
The 15-91 works so well for piecing.


Here's a close-up of the quilt, I am so happy with how this turned out!  I think that this may be one of the more intense patterns I've made so far and the results are incredible.  If you have any ideas for how I could quilt this I would love to hear them.
 
Have a wonderful day!
 
~Brandy


Saturday, July 8, 2017

Christmas is Coming...

Christmas in July that is!

https://confessionsofafabricaddict.blogspot.com/


I'm super excited to be participating in the Christmas in July blog hop this year, hosted by Sarah at Confessions of a Fabric Addict.  Here is the list of everyone who is participating with links to their page:

 Friday, July 14th

Saturday, July 15th

Sunday, July 16th

Monday, July 17th

Tuesday, July 18th

Wednesday, July 19th

Thursday, July 20th

Friday, July 21st

Saturday, July 22nd

Sunday, July 23rd

Monday, July 24th

Tuesday, July 25th
 
Everyone is showing different project ideas and some are having tutorials, it will be great to get a lot of ideas earlier in the year so we can all be ready for December!  Sarah is also having a quilt-a-long during the blog hop that looks great for using up some scraps.  Come visit me Friday the 14th to see what I make with this:
 
 
~Brandy